Quite often we have people enquiring about what they see as odd results using surfaces, most specifically to do with unexpected transparent effects when drawing surfaces to both other surfaces and to the screen. This often crops up when people want to do things such as capture the current contents of the display for use as a pause menu background, for example.
Here’s an example of what might be an unexpected effect:
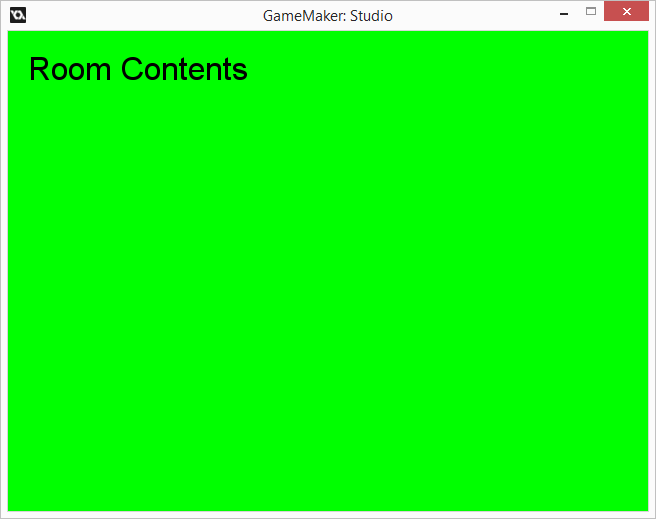
The room shown below is empty but with its background cleared to bright green.
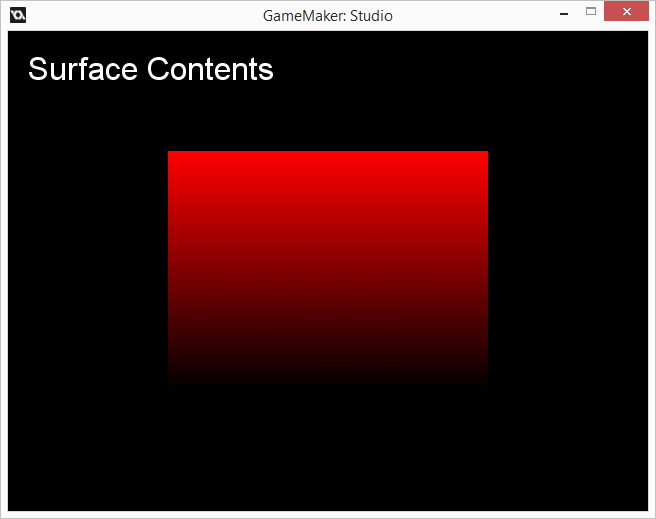
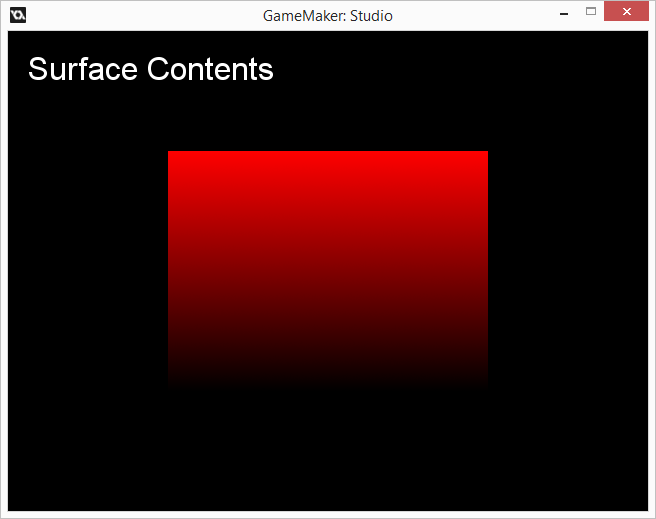
The surface shown below is cleared to black and has a sprite drawn to it which is solid red but has an alpha gradient running from top to bottom.
When we draw the surface to the room you might expect it to look exactly the same. Instead you get the following:
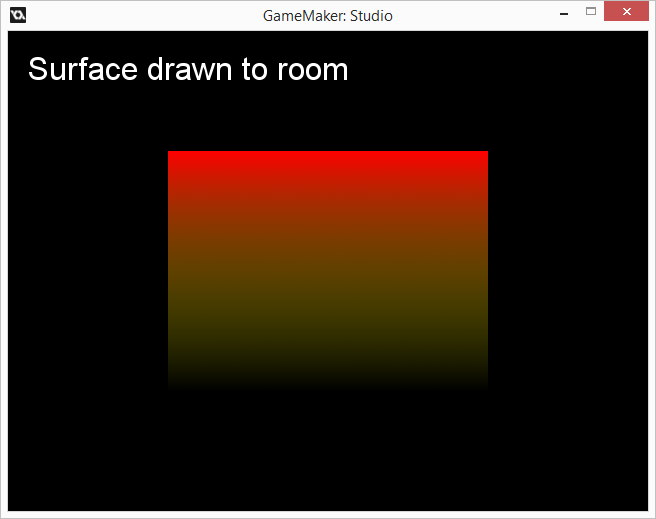
This isn’t a bug but is just the way that normal rendering works. The following sections will describe exactly why this happens.
HOW ALPHA WORKS
As most people know images are usually stored as a series of red, green and blue values, with a set of RGB values defining the colour of each pixel. Images can also contain alpha values too, which are normally used to define how transparent each pixel is.
The important thing to note is that, from the perspective of the GPU, there is no difference between any of the red, green, blue and alpha channels in most cases. They are read and written in exactly the same ways, and have the same operations applied to them when blending. The only substantive difference is that alpha normally isn’t displayed.
This consistency of behaviour is important because it helps to describe what is going on in the final screenshot above.
WHAT IS HAPPENING IN THE EXAMPLE
There are two important things to note. Firstly, all surfaces GameMaker creates contain an alpha channel. When you do a “draw_clear()” call after setting the surface as the active render target (which the example does) the alpha of all the pixels is set to 100% (fully opaque). The second important thing is that the red sprite contains non-opaque alpha and is blended onto the surface.
As previously explained alpha is treated exactly the same as the red, green and blue channels when rendering. What does this mean in practice?
To illustrate, here’s an image showing the colour and alpha channels of the example sprite.
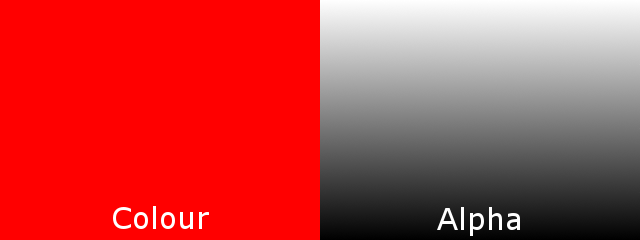
As you can see, colour is completely uniform whereas alpha varies from 1.0 at the top (fully opaque) to 0.0 at the bottom (fully transparent).
The default blend mode used by GameMaker is what most people would class as ‘standard’ alpha blending. This takes the colours of the source image, scales them by the source alpha, then adds them to the colours of the ‘destination’ which are scaled by one minus the source alpha. This happens to both the colour and alpha channels. To cut a long story short, this means that the alpha values in the surface are modified in the same way as the colour channels. See the “Blending Maths” section for more information on this.
When the red gradient sprite is drawn to the surface it blends with the black already in the surface resulting in a smooth red-to-black gradient. (To save you scrolling back up, here’s the image again):
However, here’s what it’s done to the alpha channel:
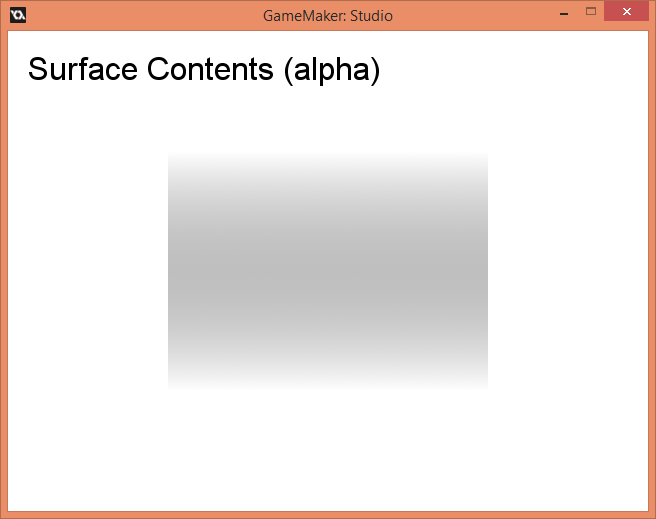
As you can see, most of the image is opaque apart from the gradient in the middle where the sprite has been drawn. The reason why the shape of the gradient doesn’t match that of the sprite (but instead fades out at both the top and bottom) is due to the effect the blending equation has on the alpha values but further discussion of this effect is outside the scope of this article.
The contents of the surface’s alpha channel explain the result shown in the final image. Here it is again:
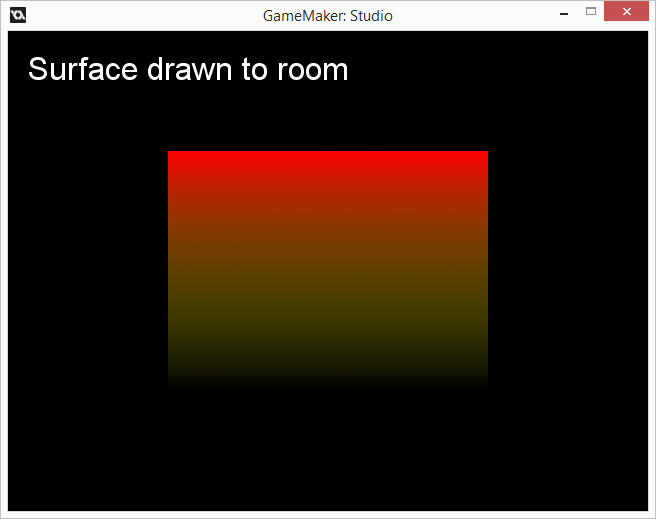
Note the way the background of the room bleeds into the centre of the gradient, matching where the alpha channel of the surface becomes more transparent.
HOW TO AVOID COMMON ISSUES
In general, most games that don’t draw large smooth alpha gradients to surfaces will not have visible issues. However, in some instances drawing using surface alpha can introduce unwanted visual problems. Although the solutions to these problems are highly case-specific in many cases the most desirable solution is to simply disable the use of alpha. This can be achieved in several ways:
1) Alpha writes can be disabled when drawing to the surface.
If you call gpu_set_colourwriteenable(true, true, true, false) this will disable writes to the surface’s alpha channel and subsequent sprite draws etc. will not modify surface alpha.
2) Alpha can be cleared before the surface is used
Disabling colour writes by using
gpu_set_colourwriteenable(false, false, false, true) then drawing a surface-covering opaque rectangle will set the surface alpha back to opaque again. Note that you can't just use draw_clear() as this uses a fast path on many platforms that doesn't always respect colour write masking. (Remember to set
gpu_set_colourwriteenable(true, true, true, true) after.)
3) Use a shader to draw the surface
Using a shader that ignores the alpha of the surface is another solution.
4) Alpha blending can be disabled when drawing the surface
This is probably the simplest approach and is achieved by simply calling
gpu_set_blendenable(false) before drawing the surface. You do lose the ability to 'tint' the alpha of the surface as is possible with the other approaches however.
BLENDING MATHS
This section gives a bit more information on how the maths of blending actually works. The general blending equation is in the form:
FinalColour = (SourceColour * SourceBlendFactor) + (DestPixelColour * DestBlendFactor)
Where:
SourceColour = the pixel that’s going to be blended
DestPixelColour = the colour currently in the frame buffer
FinalColour = the new colour that is written back to the frame buffer
And SourceBlendFactor and DestBlendFactor are each one of several factors multiplied against the source and destination pixels respectively.
This equation is applied to each of the red, green, blue and alpha channels individually, so the equations are:
FinalColourR = (SourceColourR * SourceBlendFactorR) + (DestPixelColourR * DestBlendFactorR)
FinalColourG = (SourceColourG * SourceBlendFactorG) + (DestPixelColourG * DestBlendFactorG)
FinalColourB = (SourceColourB * SourceBlendFactorB) + (DestPixelColourB * DestBlendFactorB)
FinalColourA = (SourceColourA * SourceBlendFactorA) + (DestPixelColourA * DestBlendFactorA)
For the standard GameMaker blending setup the blend factors are the following:
SourceBlendFactor = SourceColourA
DestBlendFactor = 1 – SourceColourA
Resulting in:
FinalColourR = (SourceColourR * SourceColourA) + (DestPixelColourR * (1 – SourceColourA))
FinalColourG = (SourceColourG * SourceColourA) + (DestPixelColourG * (1 – SourceColourA))
FinalColourB = (SourceColourB * SourceColourA) + (DestPixelColourB * (1 – SourceColourA))
FinalColourA = (SourceColourA * SourceColourA) + (DestPixelColourA * (1 – SourceColourA))
Incidentally, the maths of the alpha component of this blending equation explains the pattern shown in this image:
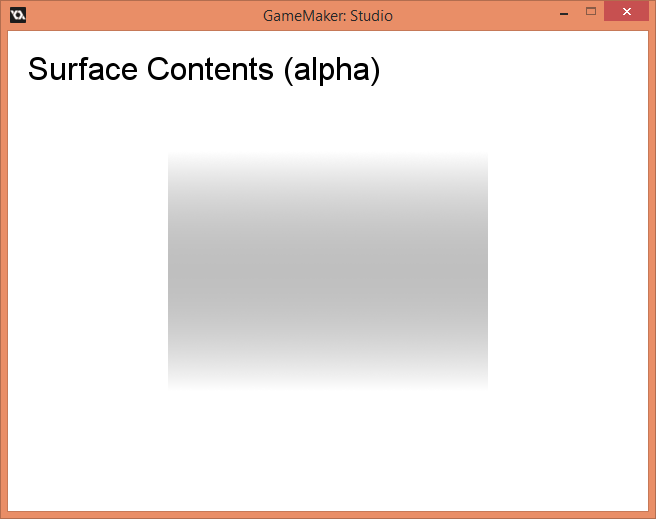
Half-way down the sprite image the source alpha is 0.5 (and the destination alpha is 1.0). Following this equation we get:
FinalColourA = (SourceColourA * SourceColourA) + (DestPixelColourA * (1 – SourceColourA))
FinalColourA = (0.5 * 0.5) + (1.0 * (1 – 0.5))
FinalColourA = 0.75
So a source alpha value of 0.5 and a destination alpha value of 1.0 results in a final value of 0.75 being written to the surface.
For more information about blend factors supported by GameMaker, see the help page for gpu_set_blendmode_ext() in the documentation.

